Contents
|
||||||||||||||||||||
If you're looking for a new flying challenge, you'll find it behind the controls of a floatplane. Because floatplane pilots typically operate beyond the runways, control towers, and navigation aids of airports, they are, by necessity, more self-sufficient than their land-based counterparts.
 Kenmore Air deHavilland Beaver |
Approaching a high mountain lake in the middle of the wilderness in a floatplane, it's up to you to determine where the wind is coming from, where to land, and what to do if something goes wrong.
A floatplane is a type of seaplane—an airplane that can land on and take off from water—and is supported on the water by pontoons, called "floats." Seaplanes that have retractable wheels are known as amphibians, and can land on and take off from both water and runways.
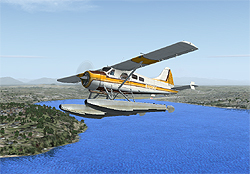 The Beaver in Flight Simulator |
There are two seaplanes in Flight Simulator: the deHavilland Beaver and the Grumman Goose. This article is an introduction to floatplane flying in general.
For specific information about the deHavilland Beaver and the Grumman Goose in Flight Simulator, see the deHavilland Beaver and Grumman Goose Aircraft Information articles.
To learn more about other kinds of seaplanes, see the Suggested Reading section at the end of this article.
Floatplanes look like landplanes, except that instead of wheels, they have floats (or floats and wheels, in the case of amphibians and flying boats like the Goose). The floats support the airplane by displacing water, just as a boat does. The floats are made of either aluminum or fiberglass, and each has at least four watertight compartments. Most floats leak a bit, so before each flight, a real-world floatplane pilot needs to inspect and pump any water out of the floats. Most floats have a V-shaped bottom to cushion landings and cut through waves, as well as "spray rails" on the inboard sides of the floats to deflect water spray away from the propeller (thus improving the pilot's vision and protecting the prop from pitting and corrosion). The floats are attached to the aircraft by streamlined struts and held apart from each other by spreader bars.
Some floats have a water rudder hanging off their aft (rear) end. The water rudders are attached to cables that go to the rudder pedals in the cockpit. Another set of cables runs from the water rudders to a handle in the cockpit that retracts and extends the water rudders (they should always be "up" for takeoff and landing). Using the water rudders, you can steer the floatplane on the water quite effectively.
Some amphibians have retractable wheels on each float. The bow wheels fold up, and the wheels just behind the step recess into the floats. Amphibious floats are much heavier than "straight" floats, which don't have wheels.
The Grumman Goose is a flying boat, which means that it lands on its hull when landing on the water. The Goose's floats retract and extend from the wingtips and are for stabilizing the aircraft on the water. The Goose's landing gear extend and retract from the fuselage.
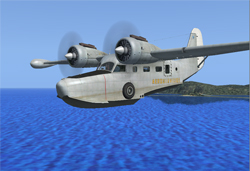 The Goose on approach (wheels up) |
An important part of floatplane operations (especially on the water) is knowing what direction the wind is blowing from. In the real world, there are many ways to determine wind direction: you can look at the surface of the water, at trees along the shoreline, at smoke from nearby buildings or fires, or at sailboats. In Flight Simulator, you don't have as many options:
- If you're at a seaplane base, there may be a windsock.
- Listen to a nearby airport's ATIS, AWOS, or ASOS broadcast.
- If you're on the water, let the floatplane weathercock into the wind (see the "Moving on Water" section).
- Press SHIFT+Z once to display the aircraft's position and altitude, as well as the wind direction and speed (for example, "130/15" means the wind is coming from 130 degrees at 15 knots) at the aircraft's current position.
There are four ways to move a floatplane on water:
- Displacement taxi
- Plowing taxi
- Step taxi
- Sailing
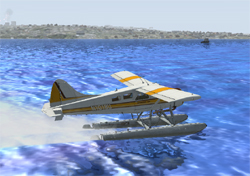 The displacement taxi |
The displacement taxi is the slowest method of taxiing, and is so named because the floats displace additional water when they move. The displacement taxi should be used when approaching or leaving a dock or ramp area or when maneuvering in a crowded harbor. Bring the throttle back to idle, and taxi at the slowest speed possible, using the water rudders to turn (press CTRL+W to raise/lower). Keep in mind that you need to be moving for the rudders to be effective. You'll probably notice that the aircraft turns faster to the left than to the right. This is due to the left-turning tendencies of the aircraft—something that also affects it in flight, especially at higher power settings.
As you taxi, keep the yoke all the way back (toward you). This technique keeps the propeller out of the spray and the water rudders in the water, and prevents the bows of the floats from diving into the water. The only exception to this procedure is if you're taxiing with a strong wind behind you. In that case, keep the yoke all the way forward (away from you) so that the wind striking the elevator pushes the tail of the plane down, thereby raising the nose.
Since a floatplane is less stable on the water than a landplane is on land, it's important that you keep the ailerons in the proper positions as you taxi, especially if it's windy. If you're taxiing into the wind, turn the yoke into the wind. If you're taxiing away from the wind, turn the yoke away from the wind. Following these simple rules prevents the wind from getting under the upwind wing and lifting it, which could capsize the floatplane.
A floatplane has more vertical surface behind its yaw axis than in front of it and, therefore, has a tendency to weathercock (change direction into the wind), especially when the water rudders are up. This is an easy way to tell which way the wind is blowing. Once you're clear of obstructions, lift the water rudders, and you'll weathercock into the wind. You can usually turn out of the wind in no- or low-wind conditions by putting the water rudders down and using some power. If there's a strong wind, however, you'll have to use a plowing taxi.
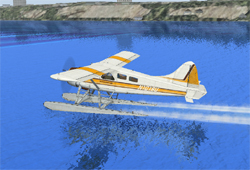 The plowing taxi |
The plowing taxi is faster than the displacement taxi, and is used to turn the plane from upwind to downwind in windy conditions. Add power, and hold the yoke all the way back—the bows of the floats lift out of the water, and the floats "plow" through the water much like a snowplow through snow. The aircraft's pivot point moves farther back, making it easier to turn. Use both the air and water rudders to turn. One way to make the turn even easier is first to initiate a slight turn in the opposite direction—the weathercocking tendency helps kick the aircraft around in the direction you want to go. Once the turn to downwind is complete, reduce the power to idle, and be careful not to let the wind catch one side more than the other, or you'll weathercock back into the wind.
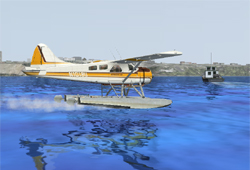 The step taxi |
The step taxi is used to taxi at even greater speeds than the displacement taxi or plowing taxi allow. As the floats move through the water in a displacement or plowing taxi, the friction between the floats and the water creates hydrodynamic drag. The faster you taxi, the more drag there is, and if you maintain a fast displacement or plowing taxi for a long time, the engine may overheat. The solution to taxiing quickly is to get more of the floats out of the water. The technique used to accomplish this is called the "step taxi:"
To perform a step taxi
|
During step taxiing, you can use the air rudder to make a "step turn." Be careful when making step turns, however—centrifugal force acts towards the outside of the turn and increases with speed. If you turn too quickly, the floatplane will tip over. During a turn from upwind (into the wind) to downwind (away from the wind), the force of the wind mostly cancels out the centrifugal force. During a turn from downwind to upwind, both the wind and centrifugal force act in the same direction, making the aircraft unstable. The downwind float could get buried underwater, and the aircraft could "trip" over itself and capsize. Therefore, in windy conditions, never make a step turn from downwind to upwind. Use a slow displacement taxi instead.
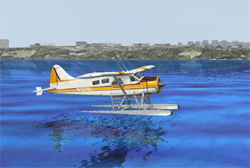 Sailing a floatplane |
In strong wind conditions, if you need to move in any direction other than into the wind, you can "sail." Let the floatplane weathercock into the wind, then—with the engine at idle—let the wind blow you backwards. If you want to sail faster, lower the flaps to make a bigger "sail" area.
To sail backwards to the left
To sail backwards to the right
To sail sideways across the wind
|
The secret to sailing a floatplane is a simple one: Practice!
To learn more about moving on the water, such as how to start out from a dock or ramp, see the books in the Suggested Reading section at the end of this article.
On land, pilots try to take off on the runway that is most closely aligned into the wind. In a floatplane, because there are no marked runways, it's up to you to determine where your takeoff lane is. Here's how to get airborne:
Verify the wind direction
See the section on "Determining the Wind Direction" earlier in this article.
Choose a takeoff lane
Whenever possible, take off directly into the wind. Sometimes, you'll have no choice and will have to take off with a crosswind—just don't let the wind lift the upwind wing, since the downwind float will get buried in the water and you could capsize. In a light wind, you can make a downwind takeoff if it's more convenient. In a strong wind, however, a downwind takeoff is not recommended, since you'll have to go faster to get to rotation speed and subject the floats to more pounding along the way. Also, make sure there are no obstructions in the way and that you have enough room to clear obstacles both on the water and in your flight path.
Perform the items on the pre-takeoff checklist
Each aircraft has its own checklist that can be found on the Kneeboard. To display the Kneeboard, press SHIFT+F10.
Scan the area for traffic
If wind conditions permit, make a 360-degree turn to scan the area for traffic, both on the water and in the sky.
Lower the flaps
Some aircraft have a suggested flap setting for takeoff. Consult the Checklist tab of the Kneeboard for the aircraft you're flying.
 The hump phase |
Request takeoff clearance or announce your intentions
If you're at an official seaplane base or near an airport, request takeoff clearance or announce your takeoff intentions on the radio. To learn more, see Air Traffic Control.
Raise the water rudders
Be sure to retract the water rudders (press CTRL+W) before you start the takeoff run. If you leave the water rudders down, they can get damaged or damage the floats.
Hold the yoke all the way back
Just as when taxiing, hold the yoke all the way back to keep the propeller clear of spray and the float tips out of the water as you accelerate.
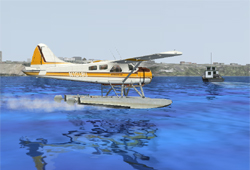 On the step |
Apply takeoff power
Apply takeoff power. The floats start pushing through the water, and as the hydrodynamic pressure increases, the bows lift out of the water, moving the propeller out of the spray. This nose-up part of the takeoff roll is called the "hump phase" because the floatplane looks like it's climbing over a hump. As the floatplane speeds up, the hydrodynamic pressure on the floats builds, more of the floats lift out of the water, and the center of hydrodynamic support moves farther aft toward the step. The left-turning tendency is greatest during this hump phase, so be ready to counter it with lots of right rudder. As the nose rises, you won't be able to see much ahead—a good reason to take a careful look before taking off.
Release the back pressure
As the floatplane reaches its maximum nose-high attitude and more of its weight is supported by the hydrodynamic pressure on the floats, relax the back pressure on the yoke to return it to a neutral position. The floatplane pitches forward and begins to plane across the surface of the water on the step. With only part of the floats now touching the water, there is considerably less drag, and the floatplane can accelerate to rotation speed (known as Vr—see the Reference tab of the Kneeboard for the aircraft you're flying). Once the floatplane is on the step, you can easily use the air rudder to change direction. See the cautions noted in the previous section on step taxiing.
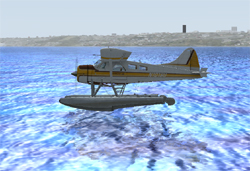 Airborne! |
At Vr, pull back slightly on the yoke. When you reach rotation speed, you'll sense a slight acceleration as the hydrodynamic drag disappears. Pull back gently on the yoke, and the aircraft will fly off the water. Don't rotate too much, or you'll drag the tails of the floats in the water!
Lower the nose slightly
After takeoff, lower the nose a little (not too much, or you'll put the tips of the floats into the water) to build speed.
Raise the flaps
Once you've established a positive rate of climb, raise the flaps if you've extended them.
In general, once a floatplane is in the air, it flies much like a landplane. There are, however, two things to consider.
Don't expect to get anywhere as quickly as in a landplane
Because of the drag created by the floats, their struts, and the associated hardware, floatplanes climb and cruise more slowly than their land-based counterparts.
Make coordinated turns
Because the floats add vertical surfaces to the front of the floatplane (forward of the aircraft's yaw axis), a floatplane has less "directional stability" than a landplane and is slower to recover from a skid. Most manufacturers add extra vertical surfaces to the tails of floatplanes to counteract this tendency, but it's still a good idea to keep bank angles shallow and to make coordinated turns with the ball in the center of the turn-and-bank indicator.
Landing a floatplane is a lot like landing a nose-wheel landplane. Here's how to do it:
Request landing clearance or announce your intentions
If you're landing at an official seaplane base or near an airport, request landing clearance or announce your landing intentions on the radio.
Determine the wind direction
See the section on "Determining the Wind Direction" earlier in this article.
Inspect the destination
Before you land, fly over your destination to create a mental map of where things are—it's much harder to see things once you're on the water. Remember: A floatplane has no brakes, so take as much time as you need to plan your approach and taxi from the air. Make sure the body of water is big enough for both landings and takeoffs. There's nothing worse than having your brand-new floatplane trapped on a majestic mountain lake forever. Also, be sure to check the water conditions and look for boats, buoys, trees, power lines, and other potential obstacles.
Choose a Landing Lane
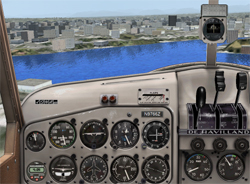 Choose a landing lane |
At some seaplane bases, there are designated landing lanes but, in general, you choose your own. As when taking off, it's best to land into the wind if possible. Touch down so that you'll come to a stop close to your destination. With practice, you'll learn how much distance your floatplane needs to stop and how to judge that distance from the air.
Using virtual cockpit view to land In Flight Simulator, landing a floatplane is easier in Virtual Cockpit view (because you can see the water to the left of the instrument panel). Press A to cycle cockpit views when in cockpit mode. To learn more, see Using Views and Windows. |
Fly a standard traffic pattern
Unless the surrounding terrain prohibits it, fly a standard traffic pattern, just as in a landplane.
Verify that the water rudders are up
As you complete the pre-landing checklist, make sure the water rudders are retracted (press CTRL+W to toggle) so they don't get damaged when they contact the water.
Verify that the landing gear is up (on Amphibians)
If you're flying the Goose, make sure the landing gear is retracted (press G to toggle). This bears repeating: When landing on water, make sure the landing gear is up! If you land on the water with the wheels down, the aircraft will capsize.
If you're flying the Goose, press SHIFT+6 to display the overhead panel, and then click the float switches to extend/retract the wingtip floats.
Set the flaps
Just as when landing a landplane, you want to touch down at the slowest possible speed, so use the maximum flap setting allowed for your aircraft.
Trim
Once you're stabilized on final approach, trim to maintain the published final approach speed.
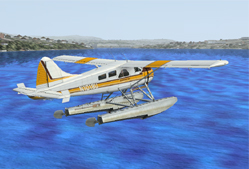 The flare |
Look around
On final approach, don't fixate on the water directly in front of you. Look at the shoreline in front or to either side so you can accurately judge your height above the surface. You can land with the power on or at idle. Because it's often difficult to judge your height above the water, a power-on landing is the easier method, since you have better control over the descent rate.
Flare
At 10 to 15 feet above the water, flare and add a little power to maintain the landing attitude. Hold the floats just above the water. The correct landing attitude in a floatplane is similar to that in a nose-wheel landplane. You can fly along like this, a few feet or inches above the water, for as long as you want to in order to avoid boat wakes or get closer to your destination.
Touchdown
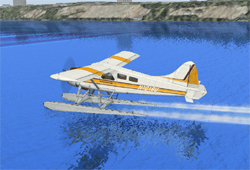 Touchdown! |
When you're ready to touch down, simply reduce power. As soon as the floats contact the water (hopefully right on the step), reduce the power to idle, unless you plan to step taxi. Remember, a floatplane has no brakes!
Gently pull back on the yoke
As soon as the floats contact the water, they create drag, and the floatplane pitches forward. The faster your touchdown speed, the greater the drag and the greater the tendency to pitch forward, so touch down as slowly as possible. Gently pull back on the yoke a bit to counteract the forward-pitching tendency. When the floatplane drops off the step and slows to taxiing speed, you can pull the yoke fully back and taxi, as described in the section on taxiing.
Amphibians let you experience the best of both worlds. You can enjoy all the thrills of a floatplane but also land on runways! In the air and on the water, there's not much difference between an amphibian and a regular floatplane. There are, however, a few things to keep in mind:
Landing on water
As mentioned previously, when landing on water, make sure the landing gear is up. Making a water landing with the gear down will capsize the plane.
Landing on land
Although it's possible to land a floatplane on grass, snow, or even concrete (those floats are tough), if you're flying an amphibian, you might as well use the wheels … especially if you plan on taxiing anywhere after you land! Wheel landings should be made as power-on landings. Don't flare too much, or you'll bang the tails of the floats on the runway. Just make a gradual descent in the landing attitude. As soon as the main wheels touch down, gently lower the nose. In a crosswind, use the wing-low method, just as with a landplane.
Taxiing in the water
Taxiing an amphibian in the water is no different from taxiing a seaplane with floats—but be aware that the landing gear makes the bows of the floats heavier, so it's important to always keep the yoke fully back when taxiing. This is not true with the Goose, which retracts its landing gear into its fuselage.
Taxiing on Land
The main thing to know about taxiing an amphibian on land is that in a strong wind, there may be a tendency to weathercock away from the wind. The vertical surfaces in front of the amphibian's yaw axis (the floats) catch more wind than the vertical surfaces behind the aircraft's yaw axis (the tail), so the aircraft tends to yaw away from the wind.
Emergency landings in a floatplane are no different from emergency landings in a landplane—but your chances of walking away uninjured are better.
Landing on the water
Landing on the water without engine power isn't too hard, especially if the landing lane is long. Just trim the floatplane for a maximum glide (depends on aircraft weight—see the Reference tab of the Kneeboard), and make a normal power-off landing, preferably into the wind.
Landing on land
In an amphibian, if you're sure you can reach a runway, then by all means use the wheels! If you must make an emergency landing in a floatplane or in an amphibian away from an airport, however, you can land on the floats or hull. Whereas wheels tend to easily get caught on things, the floats or an amphibian's hull will let you slide across a field, a glacier, or even a parking lot or road.
To land the Beaver on land using floats
|
In the event you can't find a good, flat landing area, make the best approach you can, keep flying the airplane, and try to touch down in a flat attitude—the floats and struts will absorb much of the impact. It won't be pretty, but you'll probably walk away unscathed.
If you like floatplanes, you might be interested in these related books:
Frey, J.J. How to Fly Floats.
College Point, NY: Edo Float Corporation, 1972.
Faure, C. Marin. Flying a Floatplane.
New York: McGraw-Hill, 1996.
De Remer, Dale and Cesare Baj.
Seaplane Operations. Como: Edizioni Newpress, 1998.